# Emulator
The **Emulator** lets you test mixed reality applications on your PC without a real XREAL Light glasses and computing unit. With Emulator, you can speed up app development by testing, iterating and debugging without having to build and deploy the app to XREAL device. You could simply **use Unity to test your app by importing an Emulator Prefab.**
Controlling the Emulator is very similar to common 3D video games. You can use keyboard and mouse to control the head pose movement, controller rotation, trackable planes or images in 3D space.
**In this section, you will learn:**
* How to enable Unity to debug MR apps as an Emulator.
* How to simulate input events that are usually read by XREAL Light glasses and controller sensors by using your keyboard and mouse when debugging.
### Prerequisites
* Understanding NRSDK concept and working flow
* Import NRSDK into Unity
* Have the code and resources of your app ready
### Find Emulator in NRSDK package
NRSDK > Emulator

### Emulator Structure
**Emulator** folder contains all the code and resources of Emulator, here is a brief introduction for you to lookup.
* **Editor** contains the script used for modifying Unity Editor.
* **Image** contains the UI image resources to show controller state.
* **Material** contains the materials for TrackableImage and TrackablePlane in Emulator.
* **Model** contains the room model used in the sample scene.
* **Prefabs**
* `NRTrackableImageTarget.prefab` used for simluating the detection of images.
* `NRTrackablePlaneTarget.prefab` used for simulating the detection of planes.
* **Resources** used for dynamic loading resource.
* **Scene** contains two demos for testing TrackableImage and TrackablePlane.
* **Script**
* `NativeEmulator.cs` used for calling low-level API.
* `NREmulatorManager.cs` is the script for managing the life cycle of Emulator.
* `NREmulatorController.cs` simulates the input of controller.
* `NREmulatorHeadPose.cs` simulates the headpose movement.
* `NRTrackableImageBehaviour.cs` is the script to simulate the trackable images.
* `NRTrackablePlaneBehaviour.cs` is the script to simulate the trackable planes.
* `NRTrackableObserver.cs` is the observer of trackable target.
* `TrackableFoundTest.cs` is a testing script that.
### Simulating the 6DoF Head Pose
* Use WSAD on the keyboard to simulate the movement of the position of the head.
> W -> move forward. S -> move backward. A -> move left. D -> move right.
* Press Space key and Use the Mouse to simulate the rotation of the head.
* Sample Code:
```csharp
void UpdateHeadPosByInput()
{
float mouse_x = Input.GetAxis("Mouse X") * HeadRotateSpeed;
float mouse_y = Input.GetAxis("Mouse Y") * HeadRotateSpeed;
Vector3 mouseMove = new Vector3(m_CameraTarget.transform.eulerAngles.x - mouse_y, m_CameraTarget.transform.eulerAngles.y + mouse_x, 0);
Quaternion q = Quaternion.Euler(mouseMove);
m_CameraTarget.transform.rotation = q;
Vector3 p = GetBaseInput();
p = p * HeadMoveSpeed * Time.deltaTime;
Vector3 pos = p + m_CameraTarget.transform.position;
m_CameraTarget.transform.position = pos;
// Call api to simulate the headpose movement
NREmulatorManager.Instance.NativeEmulatorApi.SetHeadTrackingPose(pos, q);
}
```
### Simulating 3DoF Rotation of Controller
Sample Code: `NREmulatorController.cs`
```csharp
// Control the rotation of controller
void UpdateControllerRotateByInput()
{
float mouse_x = Input.GetAxis("Mouse X") * HeadRotateSpeed;
float mouse_y = Input.GetAxis("Mouse Y") * HeadRotateSpeed;
Vector3 mouseMove = new Vector3(m_Target.transform.eulerAngles.x - mouse_y, m_Target.transform.eulerAngles.y + mouse_x, 0);
Quaternion q = Quaternion.Euler(mouseMove);
m_Target.transform.rotation = q;
NREmulatorManager.Instance.NativeEmulatorApi.SetControllerRotation(new Quaternion(q.x, q.y, q.z, q.w));
}
```
### Simulating Controller Input
#### Phone Controller

Selecting **Emulate Virtual Display In Editor** on **NRInput** to enable **Phone Controller** simulation that stays at the lower-right corner of the Game window.
* Mouse left on TouchPad area -> Select Button
* Mouse left on APP -> App button
* Mouse left on HOME -> Home Button

#### Dev-Kit Controller
Deselecting **Emulate Virtual Display In Editor** on **NRInput** to enable **Phone Controller** simulation that stays at the lower-right corner of the Game window.


* Simulating Controller Rotation
* Press Shift + Move Mouse
* Simulating Controller Button
* Mouse left button -> Select Button

* Mouse right button -> Home Button

* Mouse middle button -> App Button

* Simulating Controller Touch (Swipe Gesture)
* Keyboard Left/ Right/ Up/ Down Arrow -> Swipe Left/ Right/ Up/ Down
   
### Tutorial: Simulating Headpose, Controller & Trackable Object
#### Run the Sample
First , `Assets/NRSDk/Emulator/Scenes/TrackableImageEmulator.unity` and `Assets/NRSDk/Emulator/Scenes/TrackablePlaneEmulator.unity` are two samples for the Emulator. Developers could directly play the scene in Unity Editor or build them into apk and run on an XREAL Device.
#### Create your own
1. Make sure you have `Assets/NRSDK/Prefabs/NRCamreaRig.prefab` and `NRSDK/Prefabs/NRInput.prefab` in the scene.
> * When Unity Editor under runtime, the `NREmulatorHeadPose.prefab` will be automatically loaded by `NRCameraRig.prefab` into the scene for simulating the head pose data.
> * When Unity Editor under runtime, the`EmualatorController.Prefab` will be automatically loaded by `NRInput.prefab` into the scene for simulating the controller input data.
2\. Place `Assets/NRSDK/Emulator/Prefabs/NRTrackableImageTarget.prefab` or `Assets/NRSDK/Emulator/Prefabs/NRTrackablePlaneTarget.prefab` to simulate the trackable images and planes.
> * `TrackableObserver.cs` is attached to every`NRTrackableImageTarget.prefab` and `NRTrackablePlaneTarget.prefab`. You need to register your own logic of Trackable found and lost into TrackableObserver.
>
> 
3\. In `/Assets/NRSDK/Emulator/Scripts/TrackableFoundTest.cs` , you could find the sample for the register event.
> * Sample Code: `TrackableFoundTest.cs`
>
> ```csharp
> public class TrackableFoundTest : MonoBehaviour {
>
> // Observer of the registed event
> public TrackableObserver Observer;
> // Showing GameObject on the detected Trackable object
> public GameObject Obj;
>
> void Start ()
> {
> Obj.SetActive(false);
> Observer.FoundEvent += Found;
> Observer.LostEent += Lost;
> }
>
> private void Found(Vector3 pos, Quaternion qua)
> {
> Obj.transform.position = pos;
> Obj.transform.rotation = qua;
> Obj.SetActive(true);
> }
> private void Lost()
> {
> Obj.SetActive(false);
> }
> }
> ```
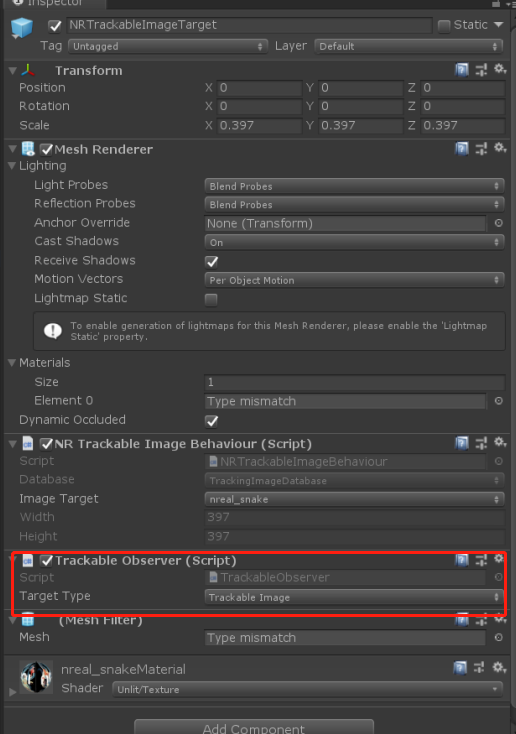
4\. If you want to use your image as a detection target, you could switch the image database in `NRTrackableImageTarget.prefab`
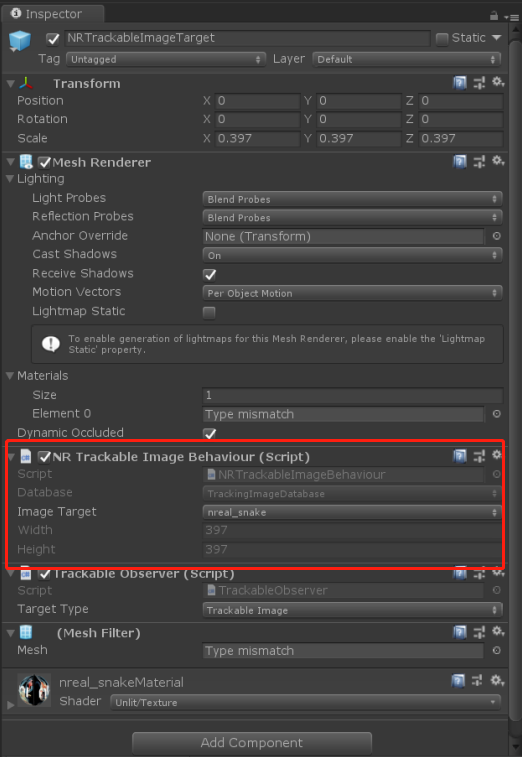
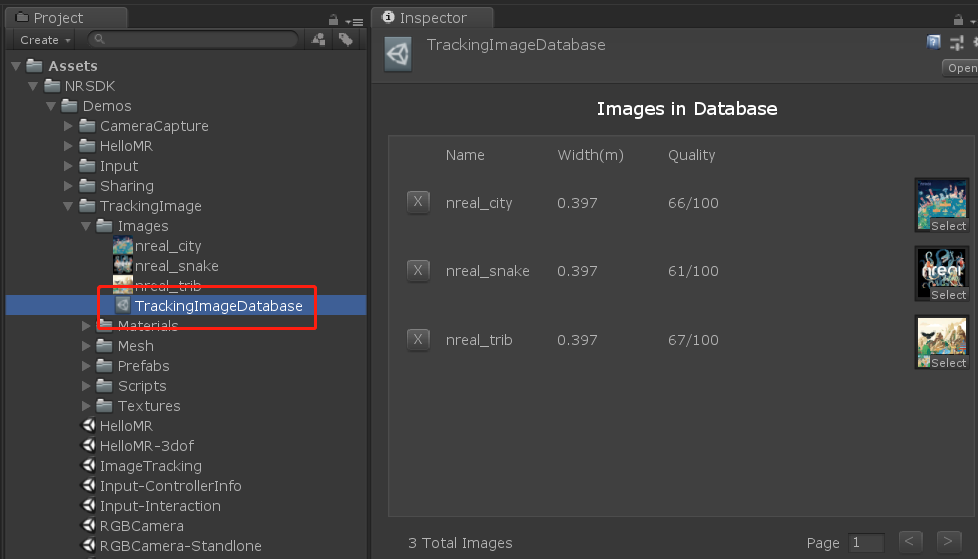
> * In NRSDK, we provided you with three default images for image detection. If you would like to add your own, please find `NRCameraRig.prefab`
>
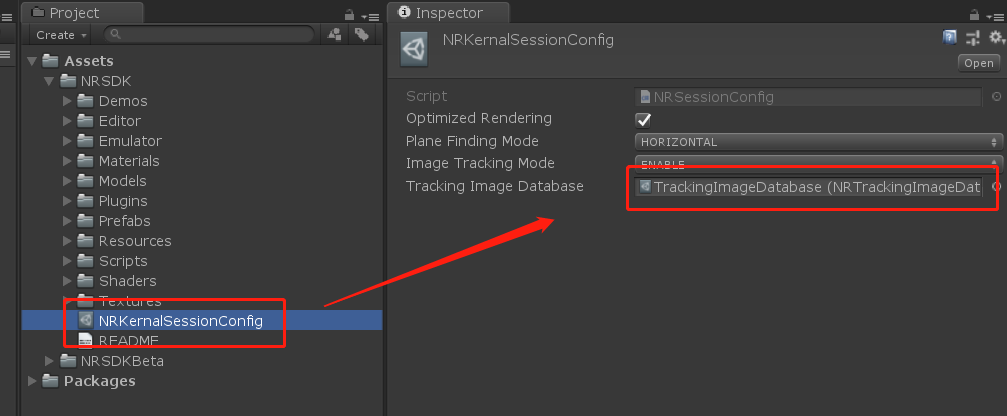
> * Find`NRKernalSessionConfig.asset` under the `NRSessionBehaviour.cs`
>
> 
>
>
>
> * Find TrackingImageDatabase in the `NRKernalSessionConfig.asset`, and drag your own database.asset into it.
>
> 
>
>
>
> * Refer to [Image Tracking](https://nrealsdkdoc.readthedocs.io/en/latest/Docs/Unity_EN/Develop/Image%20Tracking.html#image-tracking) for more inforamtion
>
> 
---
# Agent Instructions: Querying This Documentation
If you need additional information that is not directly available in this page, you can query the documentation dynamically by asking a question.
Perform an HTTP GET request on the current page URL with the `ask` query parameter:
```
GET https://xreal.gitbook.io/nrsdk/development/tools/testing-with-emulator.md?ask=
```
The question should be specific, self-contained, and written in natural language.
The response will contain a direct answer to the question and relevant excerpts and sources from the documentation.
Use this mechanism when the answer is not explicitly present in the current page, you need clarification or additional context, or you want to retrieve related documentation sections.